Crawl space encapsulation might sound like a job best left to professionals, but with the right tools, materials, and a bit of know-how, it's entirely possible to tackle it as a DIY project. Encapsulating your crawl space can bring a myriad of benefits, from improved moisture control to enhanced energy efficiency. In this step-by-step guide, we'll walk you through the process, making it accessible for homeowners looking to take matters into their own hands.
Step 1: Assess Your Crawl Space
Before diving into the encapsulation process, thoroughly inspect your crawl space. Look for signs of moisture, mold, or existing damage. Address any issues like leaks or ventilation problems before proceeding with encapsulation.
Step 2: Gather the Necessary Materials and Tools
To encapsulate your crawl space, you'll need a variety of materials, including a vapor barrier, sealant, insulation, tape, and possibly a dehumidifier. Ensure you have all the necessary tools, such as a utility knife, measuring tape, and safety gear like gloves and a mask.
Step 3: Remove Debris and Clean the Space
Clear out any debris, old insulation, or other materials in your crawl space. Sweep the area and clean any dirt or dust to create a clean surface for the encapsulation process.
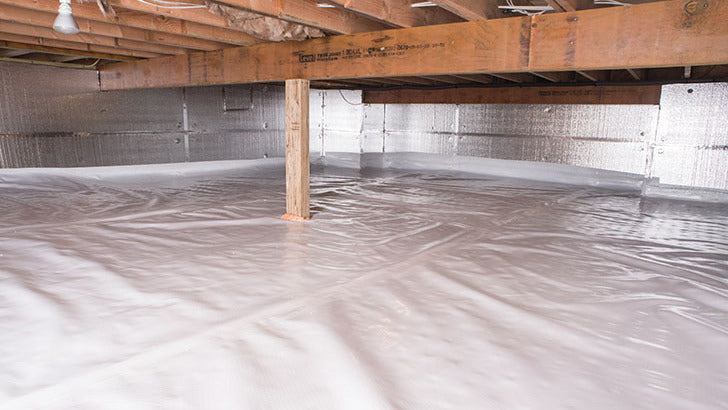
Step 4: Install Vapor Barrier
Roll out the vapor barrier across the entire floor of the crawl space, ensuring it covers all seams and extends up the walls. Use adhesive or mechanical fasteners to secure the barrier in place. Overlap the seams and tape them securely to create a continuous moisture barrier.
Step 5: Seal Gaps and Cracks
Inspect the walls and foundation for any gaps or cracks. Use a sealant to fill these openings, preventing moisture and air infiltration. This step is crucial for ensuring the effectiveness of your encapsulation efforts.
Step 6: Insulate the Walls
Attach insulation boards to the walls of the crawl space to provide additional thermal resistance. This step helps maintain a consistent temperature and enhances energy efficiency within your home.
Step 7: Install a Dehumidifier (Optional)
While not mandatory, installing a dehumidifier in your crawl space can further control moisture levels. This is especially beneficial in humid climates or areas prone to excess moisture.
Step 8: Monitor and Maintain
Regularly check your crawl space for signs of moisture or issues. Ensure that your dehumidifier (if installed) is functioning correctly. Address any problems promptly to maintain the effectiveness of your encapsulation.
Conclusion:
Embarking on a DIY crawl space encapsulation project can be a rewarding endeavor for homeowners seeking to improve their home's overall health and energy efficiency. By following this step-by-step guide and taking the time to carefully assess, plan, and execute each stage, you can successfully encapsulate your crawl space and enjoy the long-term benefits it brings to your home. If you have any doubts or encounter challenges, don't hesitate to seek professional advice for a successful encapsulation process.